制作微信名片 初始环境,配置网络,能 PING 通外网
配置 YUM 源
1
2
3
4
5
6
7
8
9
10
[root@localhost ~] [root@localhost ~] [root@localhost ~] [local ] name = This is local repo baseurl = file:///dvd enabled = 1 gpgcheck = 0 [root@localhost ~] [root@localhost ~]
安装软件包
1
2
3
4
5
[root@localhost ~] [root@localhost ~] [root@localhost ~] [root@localhost ~] [root@localhost ~]
配置 pip
1
2
3
4
5
6
7
8
9
10
11
[root@localhost ~] [root@localhost ~] [root@localhost .pip] [global] index-url=https://pypi.tuna.tsinghua.edu.cn/simple trusted-host=pypi.tuna.tsinghua.edu.cn 安装gcc,以免安装MyQR报错 [root@localhost .pip] 安装MyQR [root@localhost .pip]
安装 zbar、pyzbar、pillow
1
2
3
[root@localhost .pip] [root@localhost ~] [root@localhost ~]
编写微信名片图像解码程序
1
2
3
4
5
6
7
8
9
10
11
12
13
14
'文件名' 无所谓,以.py结尾[root@localhost ~] from pyzbar.pyzbar import decode from PIL import Image image="wx.jpg" img = Image.open(image) barcodes = decode(img) for barcode in barcodes: url = barcode.data.decode("utf-8" ) print (url) [root@localhost ~] https://u.wechat.com/MFSMySpvW2Ec2mJUjK7cn0M
编写微信代码
动态图片背景(gif)
1
2
3
4
5
6
7
8
9
10
11
12
13
'文件名' 无所谓,以.py结尾 [root@localhost ~] from MyQR import myqr myqr.run(words="https://u.wechat.com/MFSMySpvW2Ec2mJUjK7cn0M" ,version=3,picture="/root/Desktop/222.gif" ,colorized=True, save_name="233.gif" , 注意这里的后缀只能是'.jpg' , '.png' , '.bmp' , '.gif' ,建议'.gif' save_dir="/root/Desktop" ) 输出路径 这里直接执行py文件可能由于numpy版本过高报错,需要安装低版本 [root@localhost ~] 再次执行py文件 [root@localhost ~] line 16: mode: byte
标识人脸特征 安装环境
在Python官网下载 python-3.6.6-amd64.exe,如果有其它版本记得先卸载
以下命令在cmd操作 👇
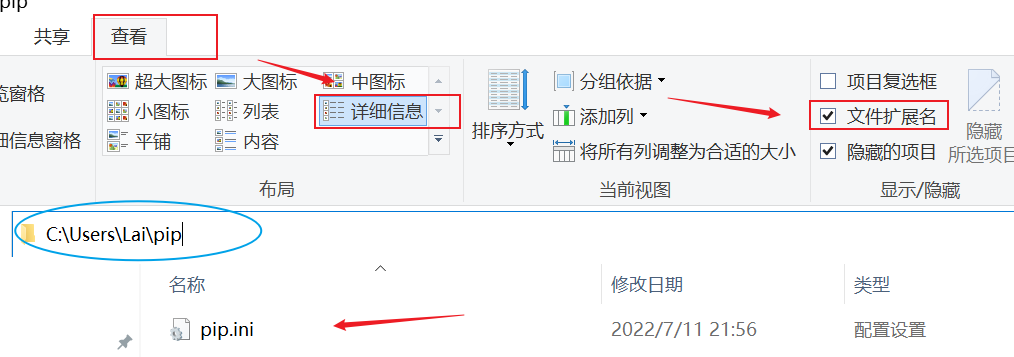
1
2
3
4
5
6
7
8
9
10
检验 python C:\Users\Lai>python --version Python 3.6.6 👈 版本 在当前目录新建pip文件夹,写一个'pip.ini' 文件 [global] index-url=https://pypi.tuna.tsinghua.edu.cn/simple [install] trusted-host=pypi.tuna.tsinghua.edu.cn
安装人脸检测相关的包
1
2
3
4
5
6
7
8
9
10
11
下载 Pillow C:\Users\Lai>pip install Pillow==7.0.0 -i https://pypi.tuna.tsinghua.edu.cn/simple/ 安装 CMake C:\Users\Lai>pip install CMake 安装 dlib C:\Users\Lai>pip install dlib==19.8.1 安装 face_recognition C:\Users\Lai>pip install face_recognition
编写人脸识别特征程序
写一个face_1.py文件,内容如下 👇
1
2
3
4
5
6
7
8
9
10
11
12
13
14
15
16
17
18
19
20
import face_recognition from PIL import Image,ImageDraw image = face_recognition.load_image_file("G312xixi.jpg" ) face_landmarks_list = face_recognition.face_landmarks(image) print ("I found {} face(s) in this photograph." .format(len(face_landmarks_list)))pil_image = Image.fromarray(image) d = ImageDraw.Draw(pil_image) for face_landmarks in face_landmarks_list: for facial_feature in face_landmarks.keys(): print ("The {} in this face has the following points:{}" .format(facial_feature,face_landmarks[facial_feature])) for facial_feature in face_landmarks.keys(): d.line(face_landmarks[facial_feature],width=5) pil_image.show()
运行程序即可
1 C:\Users\Lai>python face_1.py