酷 vnc

Cool Things:使用 vnc 连接服务器是一件很酷的事情 😎

1
2
3
[root@localhost ~]# dnf -y install tigervnc-server

[root@localhost ~]# rpm -qd tigervnc-server

文档:/usr/share/doc/tigervnc/HOWTO.md

image-20230210172904172
1
2
[root@localhost ~]# gedit /usr/share/doc/tigervnc/HOWTO.md
# 这里需要注意的一点是,当前登录的会话不能是设置的vnc用户的会话,不然无法启动服务,可以使用root用户

第一步:添加用户映射

1
2
3
4
[root@localhost ~]# vim /etc/tigervnc/vncserver.users 
# :2=andrew
# :3=lisa
:9=kiosk

image-20230211123232346

1
2
3
4
5
6
7
8
9
10
11
12
13
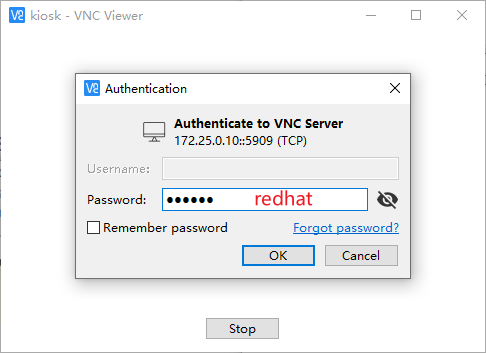
切换成kiosk用户,设置vnc的密码
[kiosk@localhost ~]$ vncpasswd
Password:【redhat】
Verify:【red】
Would you like to enter a view-only password (y/n)? 【y】 '设置为只读的密码,不要读写'
Password:【123456】
Verify:【123456】

文件生成在用户的家目录下
[kiosk@localhost ~]$ ls .vnc
passwd
[kiosk@localhost ~]$ cat .vnc/passwd
u,LL���I@��^�"[kiosk@localhost ~]$

第二步:启动服务

1
[root@localhost ~]# systemctl enable --now vncserver@:9
image-20230211170158016

补充

如果是本地的虚拟机,需要关闭防火墙,或者开启用户的端口;

如果是在服务器,则在安全组上开放端口(590x)即可。

1
2
3
4
5
6
7
8
1.直接关闭防火墙
[kiosk@localhost ~]$ systemctl stop firewalld

2.开放5909端口
[root@localhost ~]# firewall-cmd --zone=public --add-port=5909/tcp --permanent
[root@localhost ~]# firewall-cmd --reload
[root@localhost ~]# firewall-cmd --list-ports --zone=public
5909/tcp

连接

在 Windows 上使用 VNC Viewer 连接

image-20230211180214125 image-20230211180245362

设置分辨率

1
2
3
4
5
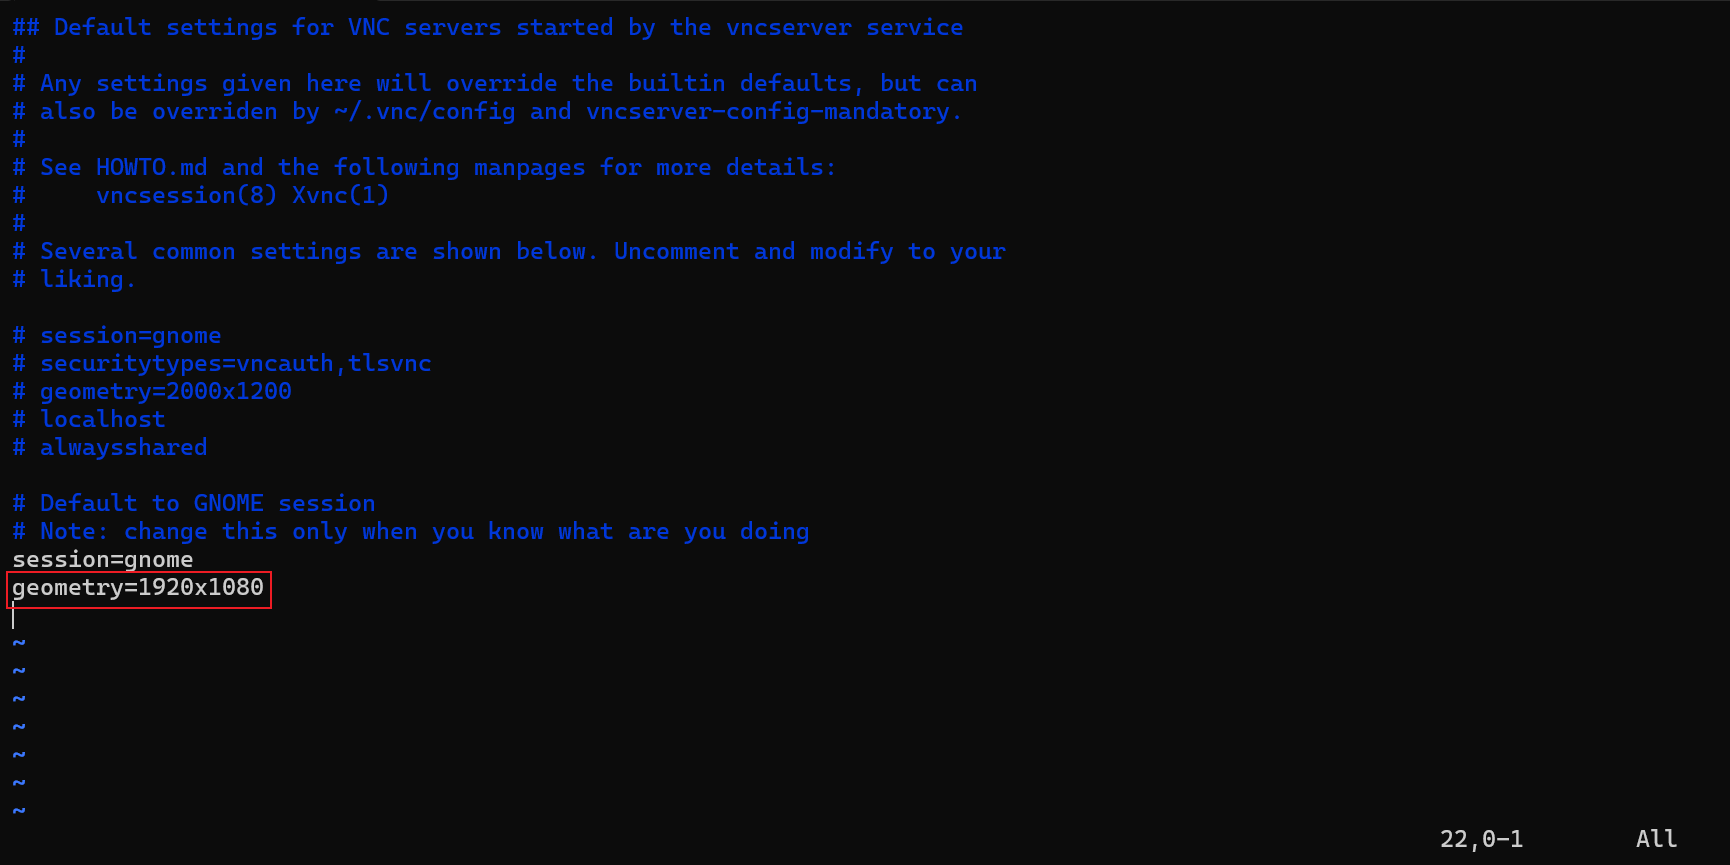
[root@Jylai ~]# vim /etc/tigervnc/vncserver-config-defaults
# Default to GNOME session
# Note: change this only when you know what are you doing
session=gnome
geometry=1920x1080
image-20230213173147620
1
2
重启服务即可~
[root@Jylai ~]# systemctl restart vncserver@:9

vnc & xrdp

如果想要同时设置 Windows 的远程连接(mstsc)和 vnc,即在服务器上同时配置 xrdp 和 tigervnc,经过我测试,需要先配置 tigervnc,再配置 xrdp,如果顺序反了先设置 xrdp 的话,会导致 tigervnc 的服务 vncserver@:x 无法正常运行,暂时还不知道原因。